Creating a New Task
With any Call a User may create and assign Tasks for themselves or another User. Any Call may have any number of associated Tasks.
To create a new Task:
- Select the Tasks Tab from the Call Details window.
- Click on the New button

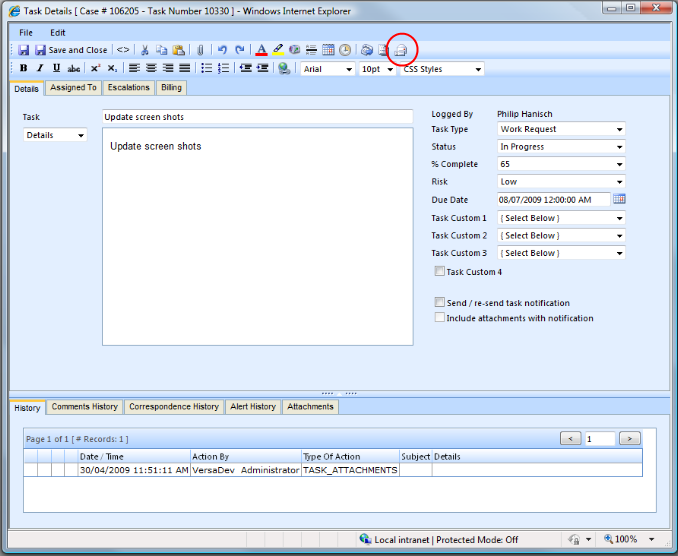
Under the Details Tab.
- Enter a Task heading.
- Enter the Task Details.
- Enter the Task Notes (if applicable initially).
- Select the Task Type
- Select the Task Status.
- Select the Task % Complete.
- Select the Task Risk.
- Enter Due Date for the Task.
- Select Task Custom 1, 2 and 3 (if applicable to your use of the system).
- Check the Send / re-send Task notification checkbox if required.
Under the Assigned To Tab.
- Click on the
 button, and select the person you wish to assign the Task to from your directory.
 - Alternatively, manually enter the requested contact details.

Under the Notes & Resolution
The Notes & Resolution Tab allows entry of Notes and a Resolution relavent to the task.
- Enter notes
- Enter Resolution.

Under the Escalations Tab
The Escalations Tab allows five levels of escalation. That is, the User is able to define five points in time at which the specified email addresses will be sent an Overdue Notification by the application.
For each Escalation level the User wishes to use:
- Enter a date (later than the Due Date) on which the User requires the Escalation notice to be sent.
- Enter the email addresses (manually or via the Contact Picker) to which the notification should be sent.

Under the Forms Tab
The Forms Tab allows the user to add forms to a Task.
- Click Select under the forms tab.
- Browse through and select the required form and click Add.

Under the Sheets Tab
The Sheets Tab allows the user to add Sheets to a Task.
- Click Select under the sheets tab.
- Browse through and select the required Sheet and click Add.

Under the Assets Tab
This tab allows the linking of an Asset to a Task, as well as showing the current assets that are already linked.
- Select the type of ID that will be used to link the Asset.
- Enter the ID in the available field.
- Click Add to link the Asset to the Task.
- The search button allows the user to search for Assets to add instead of typing in the ID.

Under the Billing Tab
The Billing tab allows Billing details to be recorded against the Call.
- Select to apply to either the primary or secondary company.
- Check the No Charge check box if required.
- Enter the Number of Transactions
- Enter the billing times and set to cumulative if required.
- Enter the billing amount.

Under the History Tab.
The History tab is where the Task audit history can be viewed.

See Also
Adding comments to a Task
Reassigning a Task
Closing a Task
Call Overview